Searching and the app grid
Lightspot searches everything it knows on every keystroke and groups the results into sections. This page covers the panel, the app grid, how results are ranked and every keyboard shortcut.
Lightspot guide
Opening Lightspot
Press ⌘Space, or the shortcut you picked in the menu bar (⌘⇧Space or ⌥Space). Press it again, press Esc or click anywhere outside to hide it. You can also choose Show Lightspot from the menu bar icon, or open Lightspot from Finder or Launchpad while it is running. If another app already owns the shortcut, Lightspot tells you at launch; see When ⌘Space is taken.
The panel opens on the screen that has the mouse pointer, centred horizontally and near the top. It is a search capsule with a results area below it, drawn with the same translucent glass as Spotlight. You can drag it by its background.
The app grid
With nothing typed, the field says Applications and Lightspot shows a grid of apps, seven per row. The first row holds seven recent apps: the ones you last opened through Lightspot, then apps that are running, then the rest alphabetically. Below it, every app is listed under its category.
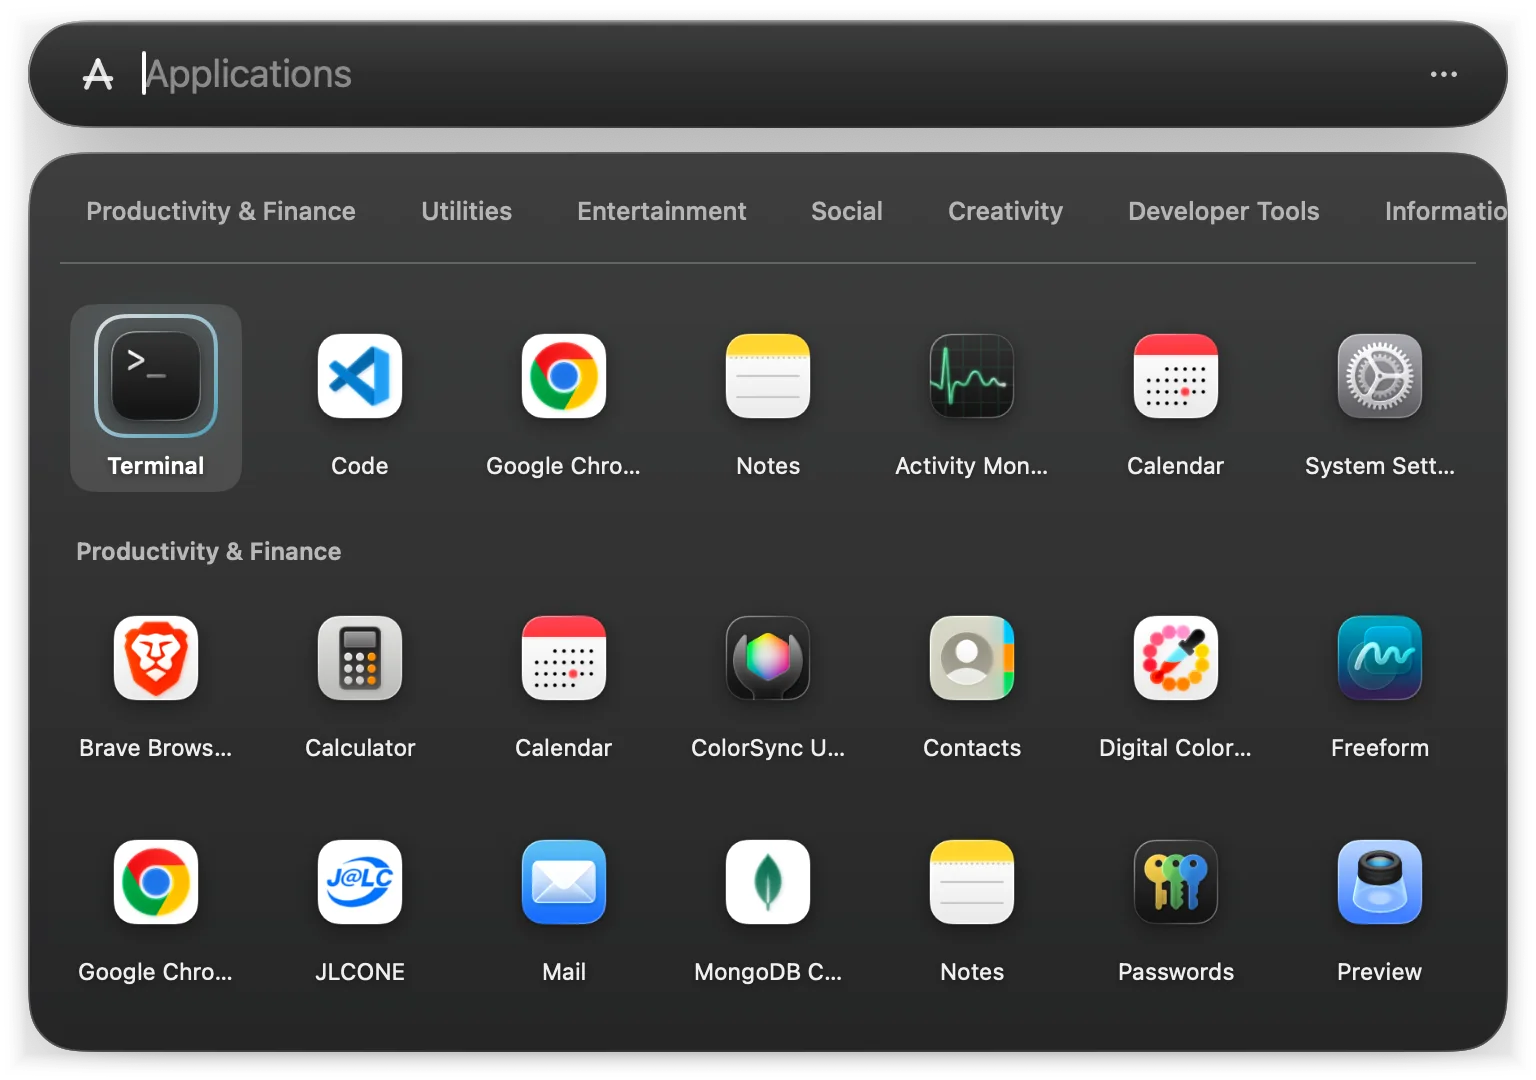
The tabs across the top filter the grid to one category: Productivity & Finance, Utilities, Entertainment, Social, Creativity, Developer Tools, Information & Reading and Other. Press Tab and ⇧Tab to step through them, or click one; clicking the selected tab again shows all apps.
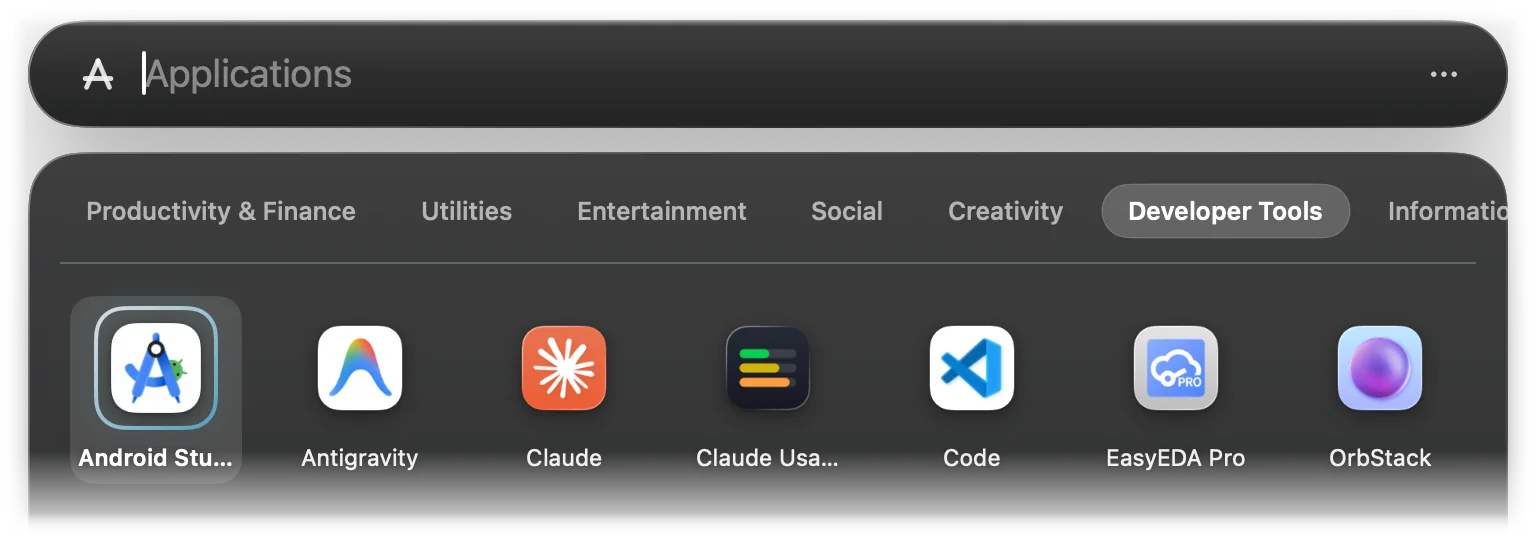
The category comes from the category the app declares in its Info.plist (LSApplicationCategoryType). Apps that declare none are placed by keywords in their name and bundle identifier, and anything left over goes to Other. Use the arrow keys to move through the grid and ↵ to open the selected app.
Lightspot finds apps in these folders, up to three levels deep:
/Applicationsand~/Applications/System/Applicationsand/System/Applications/Utilities/System/Library/CoreServices/Applications
It rescans them when you open the panel and the last scan is more than a minute old, so a newly installed app shows up the next time you open Lightspot after that.
Results
As soon as you type, the grid is replaced by results. Lightspot does not wait for you to stop typing: the whole search runs again on every keystroke. Results are grouped into sections that always appear in this order:
| Section | What it contains |
|---|---|
| Top Hit | The single best match, promoted from any section below |
| Calculator | A math result or a unit, currency or number-base conversion |
| Developer Tools | UUID, Base64, URL encoding, hashes, JWT, JSON, timestamps, colours |
| Applications | Installed apps |
| Recent Projects | Folders from VS Code, Cursor, Zed, JetBrains IDEs and Sublime Text |
| Text Snippets | Snippets whose keyword or name matches |
| Clipboard History | Text you copied while Lightspot was running |
| Browser History & Bookmarks | Open tabs, bookmarks and recent history of your default browser |
| System Settings | Direct links to 35 System Settings panes |
| Quick Actions | Lock, sleep, empty trash, flush DNS… plus the hardware readout and the process killer |
| Custom Commands | Commands you defined |
| Terminal History | Commands from your zsh history, pinned ones first |
| Web Search | Search the web for what you typed, always last |
Each section shows at most four results, except Terminal History and Browser, which show up to six. Calculator and developer-tool results lead because they only appear when your text actually parses as math or as a tool command, so when they appear they are almost always what you want.
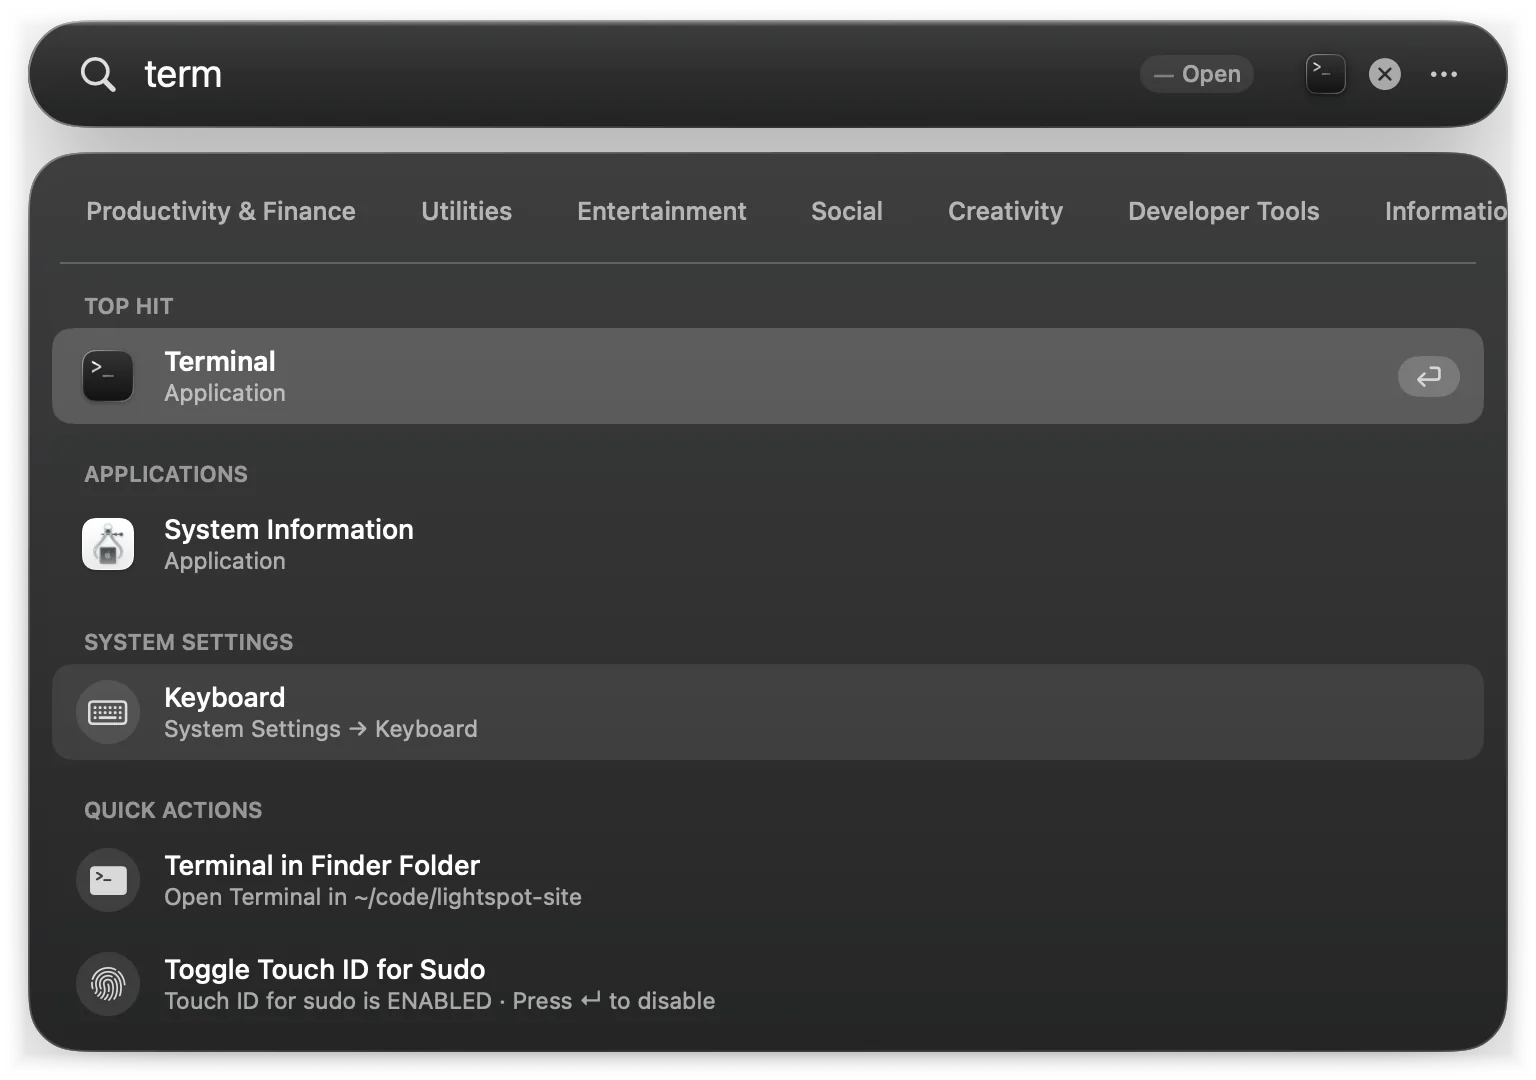
The little label in the search field says what ↵ will do with the selected result: Open, Copy, Run, Search, Terminate, or, for a project, Open ↵ · Terminal ⌘↵ · Finder ⌥↵. When an app matches, the icon of the best-matching app appears next to the label.
If nothing matches at all, Lightspot still offers to search the web for your text.
How text is matched
Matching ignores case. Every candidate gets a score from the first rule it passes, with the highest scores first:
| Rule | Score | Example: “Visual Studio Code” |
|---|---|---|
| Exact name | 100 | visual studio code |
| Name starts with the text | 95 | vis |
| A word starts with the text | 85 | stud, code |
| Initials (apps) | 80 | vsc |
| Text appears anywhere | 65 | dio |
| Letters appear in order | 40 | vscd |
Many sections also match keywords (System Settings panes and quick actions have synonyms, so wifi, wlan and ssid all find Wi-Fi), and some ignore weak matches: Terminal History, Recent Projects and Browser need at least a substring match.
Top Hit
The highest-scoring result becomes the Top Hit, as long as it scores 60 or more, and moves out of its own section. A few kinds of results are treated differently:
- Calculator results are never the Top Hit; they have their own card at the top instead.
- Web search only becomes the Top Hit for a search prefix such as
gh reactor for an address such aslocalhost:3000. - A Terminal History command becomes the Top Hit only if it is pinned or you picked it before for the same text, so typing
gitdoes not suddenly run a random git command.
Lightspot learns from your choices
Every time you open a result, Lightspot remembers what you typed and what you picked. Next time, that result gets a bonus of up to 50 points on top of its match score:
- Same text: +20 if you typed exactly this before and picked it; if what you typed so far is the start of what you typed then, up to +10.
- Recency: up to +15, halving after two days, a third after four days, and so on.
- Frequency: grows with how often you picked it (3.5 for once, 7 for three times, 10.5 for seven times), up to +15.
The bonus applies to everything except calculator results, developer tools and web search, whose answers depend only on what you typed, and clipboard entries and kill actions, which Lightspot does not record.
Search history
Press ⌘Y or ⌘⇧H, or choose Search History… in the menu, to see what you picked and when. Each row shows the result, the text you typed in quotes, how long ago and how many times.
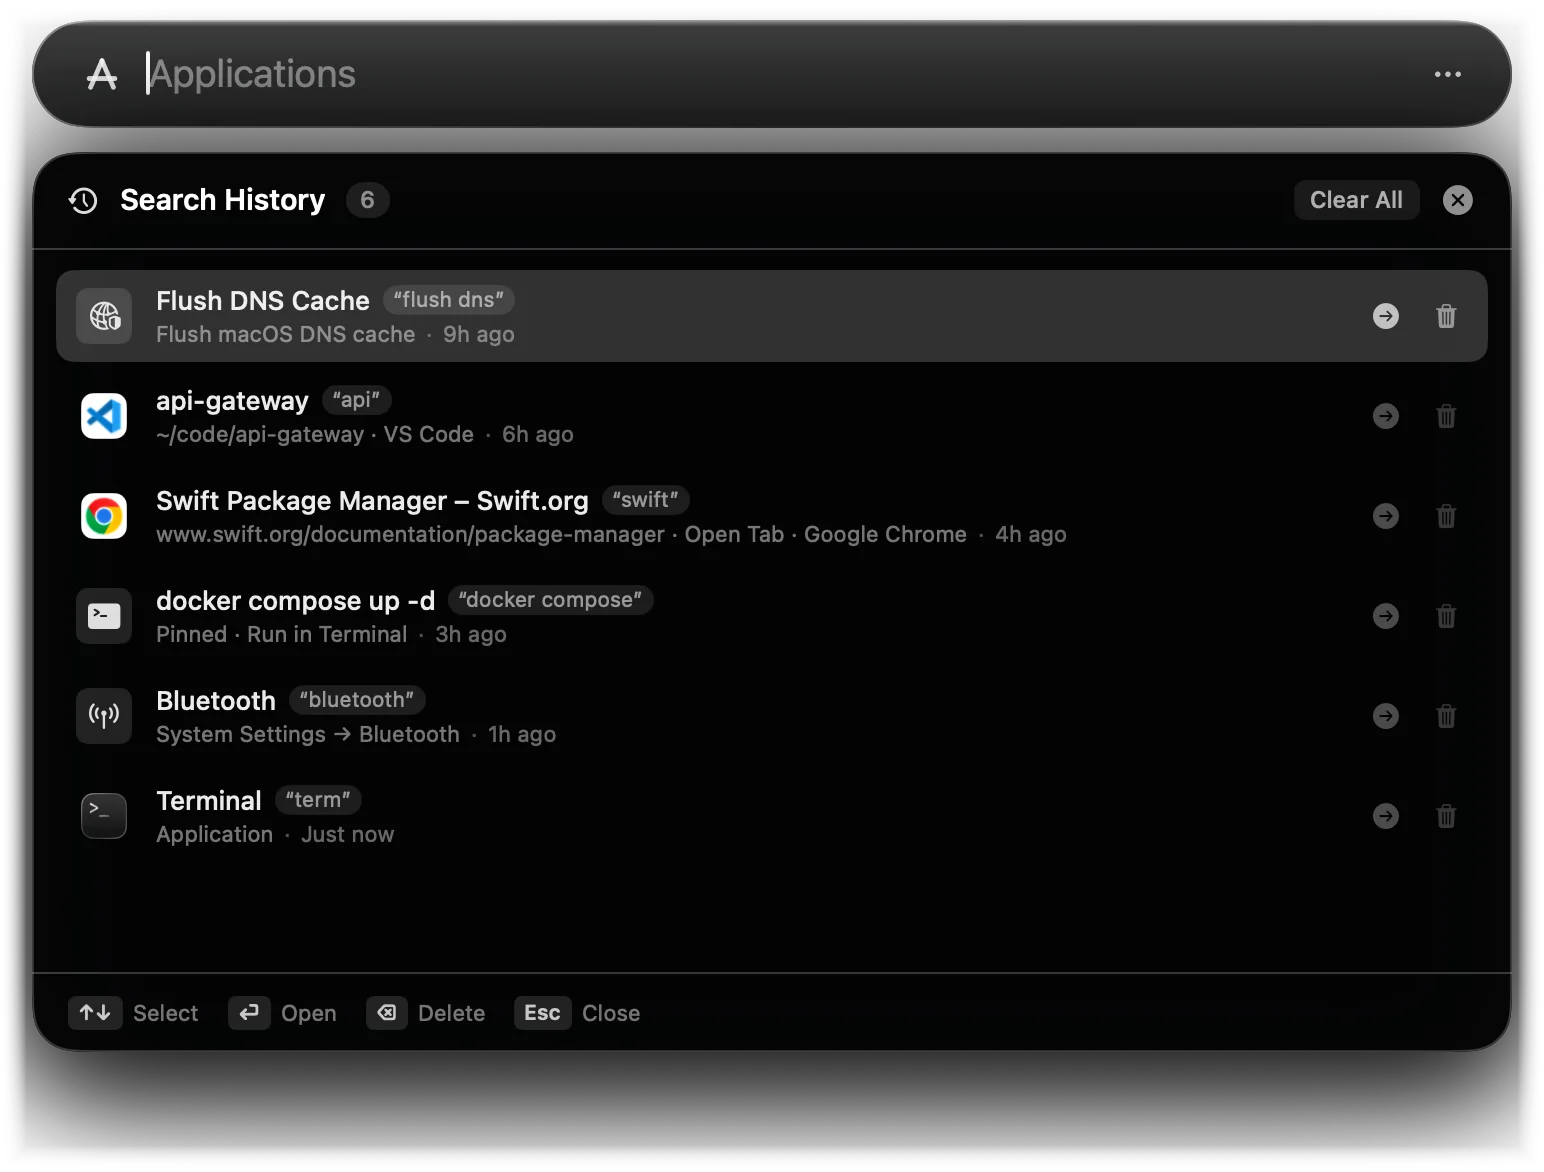
Use the arrow keys and ↵ to open an entry again, ⌫ to delete the selected entry, or the buttons on each row. Clear All (or Clear Search History in the menu) wipes the list and resets everything Lightspot learned. Deleting one row removes it from the list but keeps its ranking bonus. Lightspot keeps the 200 most recent entries and statistics for up to 500 results.
Not everything is remembered. Clipboard entries, calculator answers, developer tools and kill actions are never recorded, and results that only copy text, such as snippets, count towards ranking without appearing in the list. See what Lightspot stores.
Keyboard shortcuts
| Key | In results | In the app grid or an overlay |
|---|---|---|
| ↑ ↓ | Previous / next result (wraps around) | Up / down one row; previous / next item in an overlay |
| ← → | Like ↑ ↓ when the cursor is at the start / end of the text | Previous / next app |
| Tab ⇧Tab | Next / previous app category | |
| ↵ | Open, run or copy the selected result | Open the app; run or open the selected overlay item |
| ⌘↵ or ⌘R | Project: open in your terminal. History command or shell quick action: run in your terminal. App: reveal in Finder. | |
| ⌥↵ | Project: open in Finder. App: reveal in Finder. Process: force kill. | |
| ⌘P | Pin or unpin the selected Terminal History command | |
| ⌘⇧P | Show or hide pinned commands | |
| ⌘⇧C | Show or hide custom commands | |
| ⌘Y or ⌘⇧H | Show or hide search history | |
| ⌫ | Edit the search text | Delete the selected search history entry |
| Esc | Close an overlay; otherwise clear the text; otherwise hide Lightspot | |
| ⌘A ⌘C ⌘V ⌘X ⌘Z | Edit the search text as usual | |
The ⋯ button at the right end of the search field opens the same menu as the menu bar icon, plus a few panel-only items; see Menu bar and settings.
Typing with an input method
Lightspot searches while an input method is still composing a word (the underlined text of Japanese, Chinese or Korean input, or a Vietnamese input method such as JOKey), instead of waiting for each word to be committed.
What Lightspot does not search
Lightspot has no file index, so it does not find documents, photos, mail or messages by name or content. The full list of what it reads is on the privacy page.